How to get beautiful photos for your wall and spend very little money!
I know that by being a self-employed photographer, I should be trying to upsale incredible high end prints of my work for my clients. Trust me, I know I personally would make way more money if I did not include a print release and I only allowed print credit for my clients. Coming from a household of recent college graduates, with a child and 2 dogs, I know that spending a small fortune on photos for your wall is out of the question for most households on a budget. So I have decided to share my secret for creating wall art that you can be proud of, and keep your wallet happy.
I have a few different ideas for this and I have included tutorials for 2 of them.
No Glass Frames
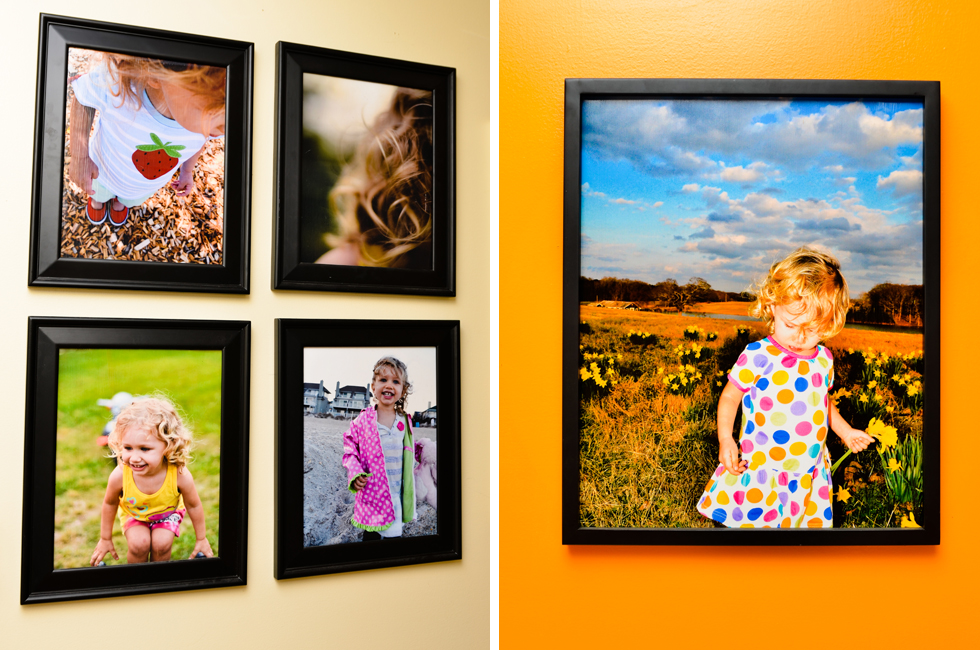
This first technique is used all over my house. I get my prints done at Costco (Please don’t shake your heads pro-photogs, I’m on a budget.)
I found cheap frames from Old Time Pottery and Thrift Stores.
(The most expensive of these were the white landscape ones below at $15 per frame at a The Pelican’s Roost in Wilmington.)
I took the glass out of the frames, so that the picture was exposed. And used Matte Modge Podge and painted over the photos.
Yes, I said paint over the photos. The Modge Podge goes on white, but dries clear.
This gives the lower quality printing paper a more textured look almost painted look, and decreases that glossy glare.
I love that it protects the photo without blocking it with the glass. They are much easier to keep safe as well. (Glass stresses me out!)
Here are my examples.

The DIY Wood Frame Photo
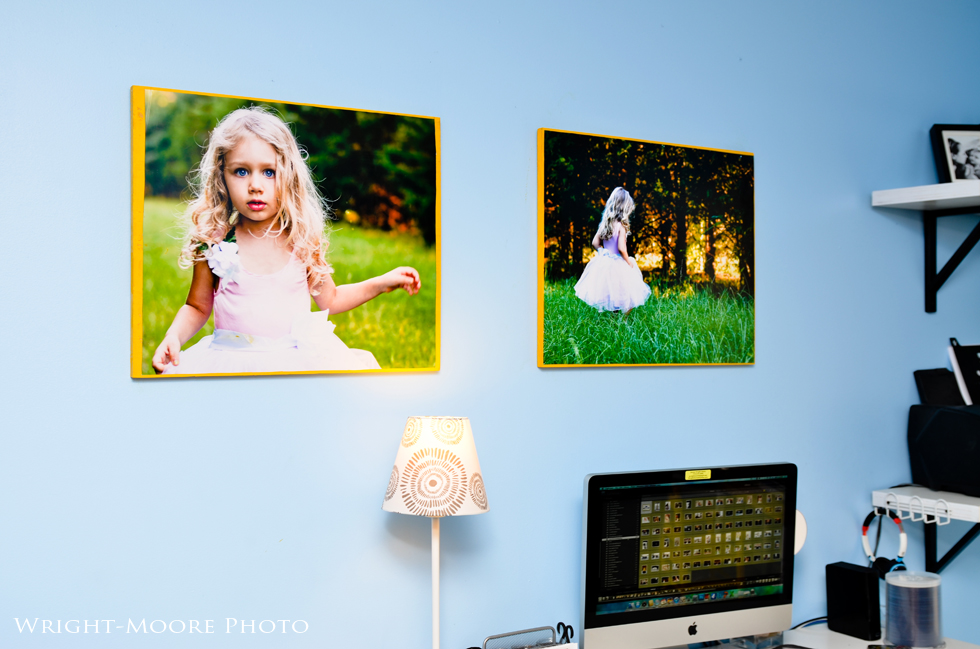
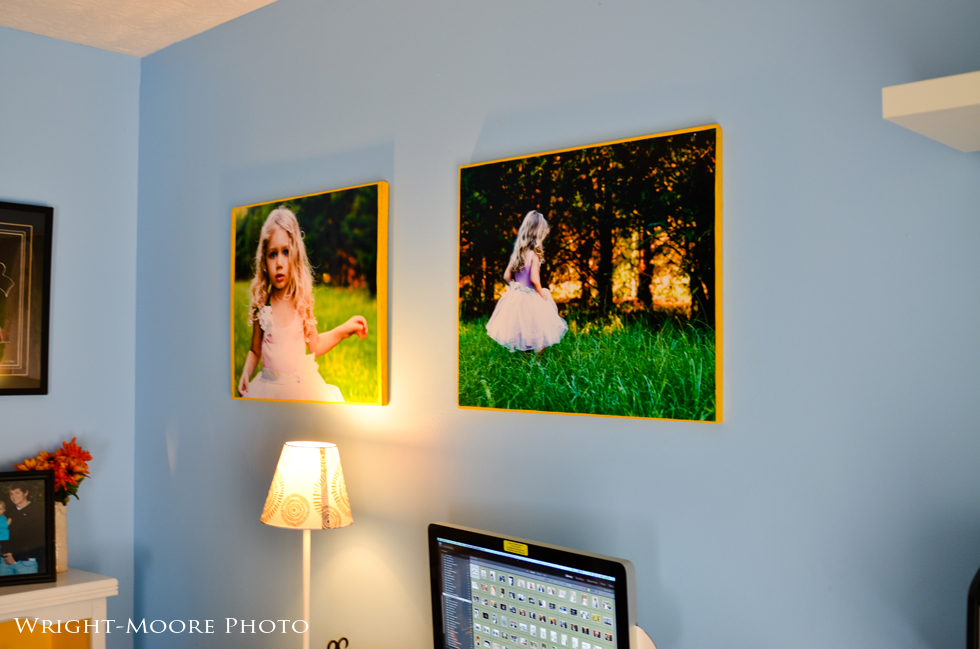
The next technique is very similar to the first except instead of frames, I wanted a more ‘Canvas’ kind of look.
I went to Lowes and bought a piece of 3/4″x 20″x 48″ Pine. It depends on the size of your prints. I knew that with this wood size, I would need to cut down my photos by 6″ each.
I was okay with losing that much of the image so I got the Lowes guys to cut the piece in half for me. I ended up with 2- 20″x 24″, perfect for my 20″ x 30″ Costco Prints
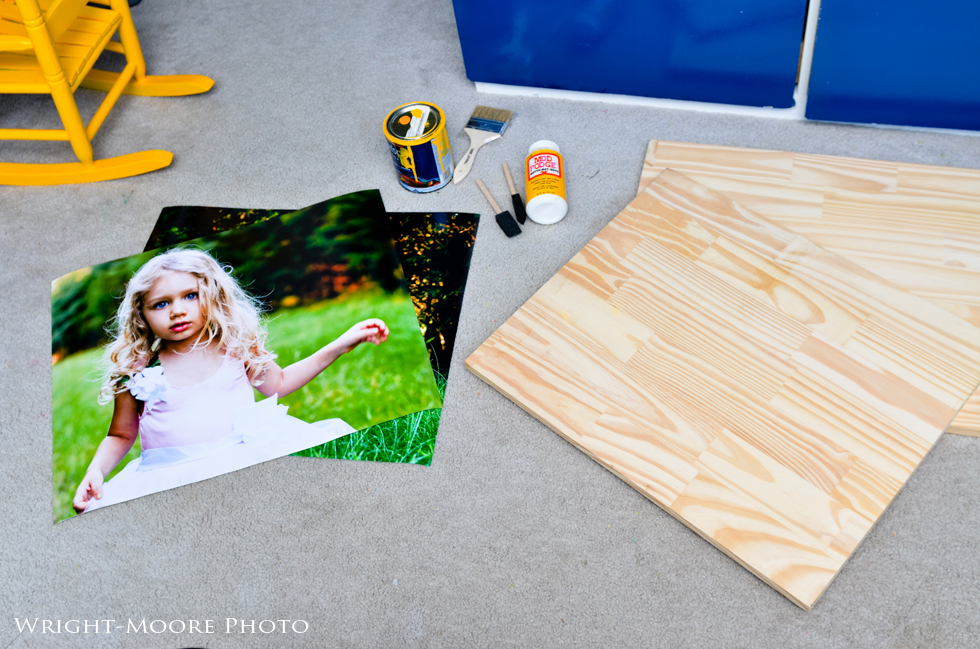
I still had yellow paint from my office makeover and thought the yellow would be another good pop of color on the walls. I used the wood to get my exact size right and trimmed the print to fit the wood.
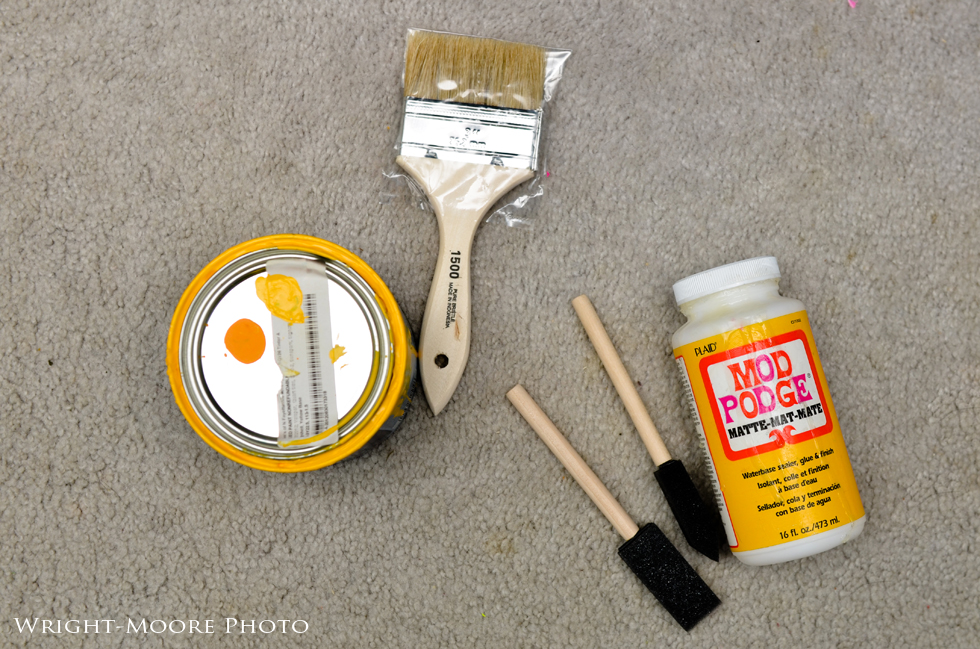
Paint the Modge Podge all over the wood making sure you get the edges of the wood well, so that your photos do not curl.
My mistake was accidentally Modge Podging the prints to the wrong wood, so one of my prints was too small for the wood and the other was to large. SO I just went with it.
I cut the larger print down so that the yellow stood out along the edges on both photos. Once you have the print on the wood, paint the Modge Podge all on top of the print as well.
Do not worry, it will dry clear!
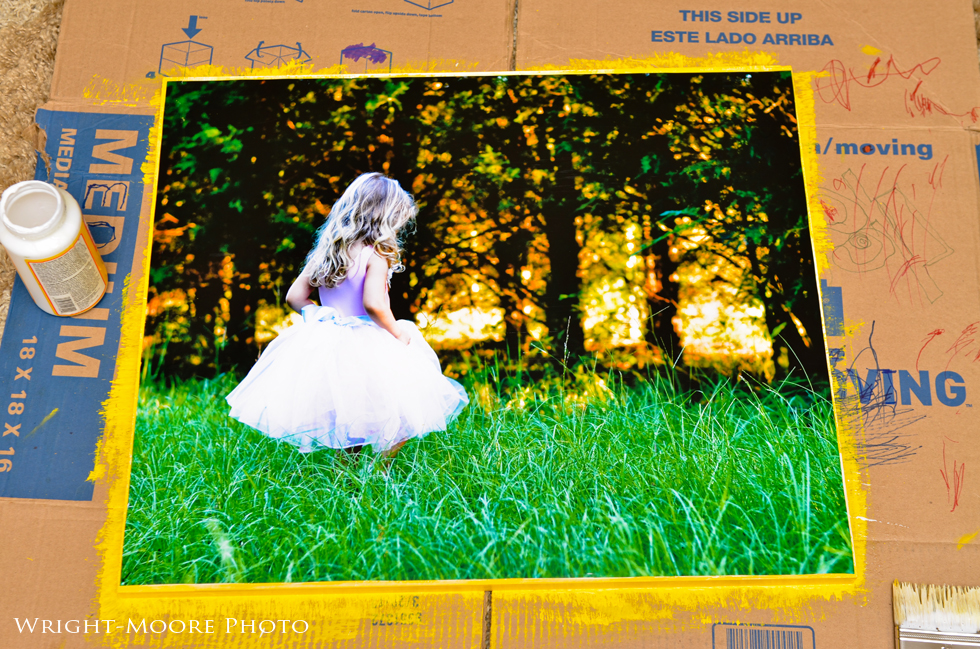
These are my finished products below. I will suggest that you make sure you cut your photos before Modge Podging, as using a razor is not exact. Pssh. My mistake is your lesson!
My cost list:
2- 20×30 Prints from Costco $19
Modge Podge $9
Cheap Paint Brushes $.50 -$1 per brush
1- 3/4″ x 20″ x 48″ Pine Board from Lowes $15
Total for 2 Large Prints
$45
Good Luck with your Wall Art, and shoot me an email if you need help!
Jwrightmoore@gmail.com